Wednesday, November 6, 2013

Warm Salad of Wheat Berries, Grapes, Cauliflower & Mixed Salad Greens

After eating this warm salad, I couldn’t resist asking for the recipe. I am not sure I got it exactly right, but this version really worked for us.
Preparation of this salad is a bit more complicated than cold salads but it is well-worth the effort.  You can also keep any extra cooked Wheat Berries in the refrigerator to add to soups, stews and things. You can easily increase the size of this salad by doubling the ingredients.
On a personal note:  I am not a great fan of Balsamic Vinegar, I find that it sometimes overwhelms, and in fact I almost never use it, but I did have a small bottle in my cabinet. Honestly, I was tempted to substitute apple vinegar or rice wine – on second thought I did not substitute and I was really relieved and surprised to find that Balsamic Vinegar actually enhanced the flavor of the salad.

[Preparation time: 30-40 minutes or 1½ hours depending on whether you cook the Wheat Berries ahead of time]
Servings: 8-10 portions or more depending on if it is side dish or a main course

Ingredients:                                                 
·       2 cups of cooked Wheat Berries**
·       1 to 1½ cups of Seedless Red Grapes (cut in half lengthwise, see picture below)
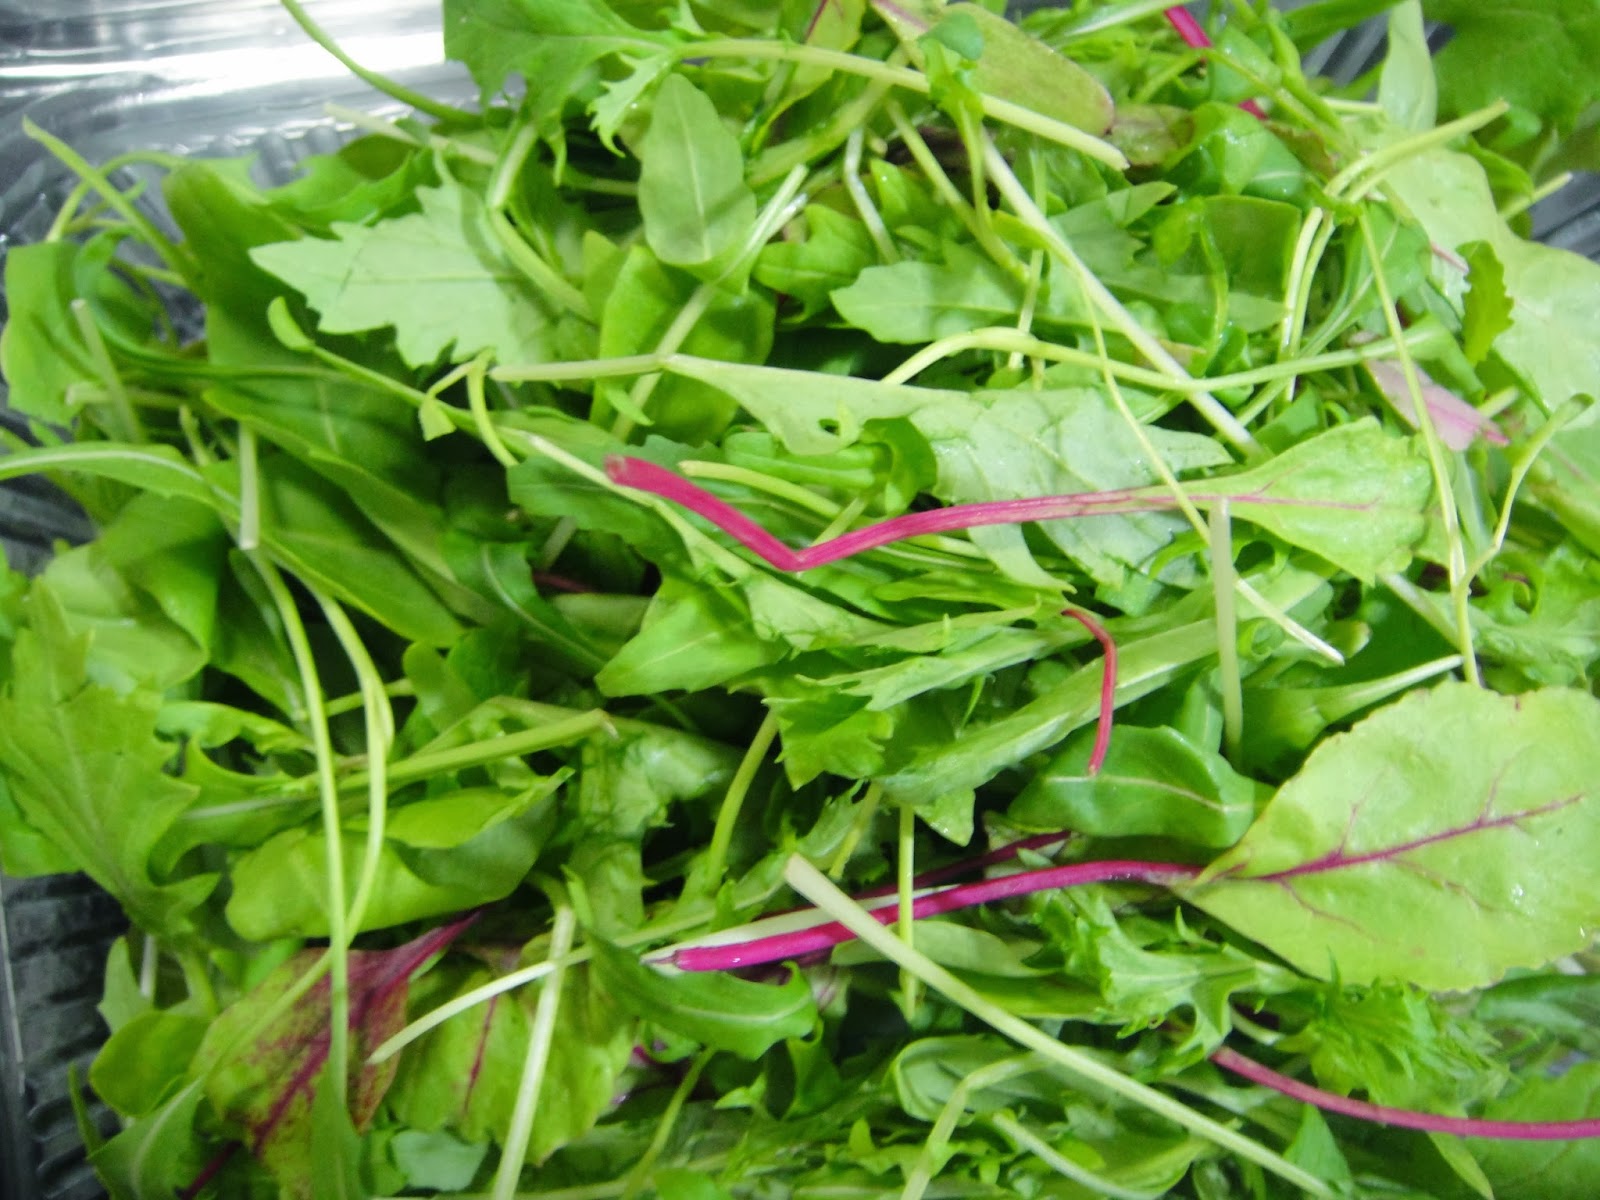
·        3-4 generous cups of Mixed Salad Greens
·        ½ head of fresh Cauliflower (cut into tiny florets)*
·       Salt and pepper to taste

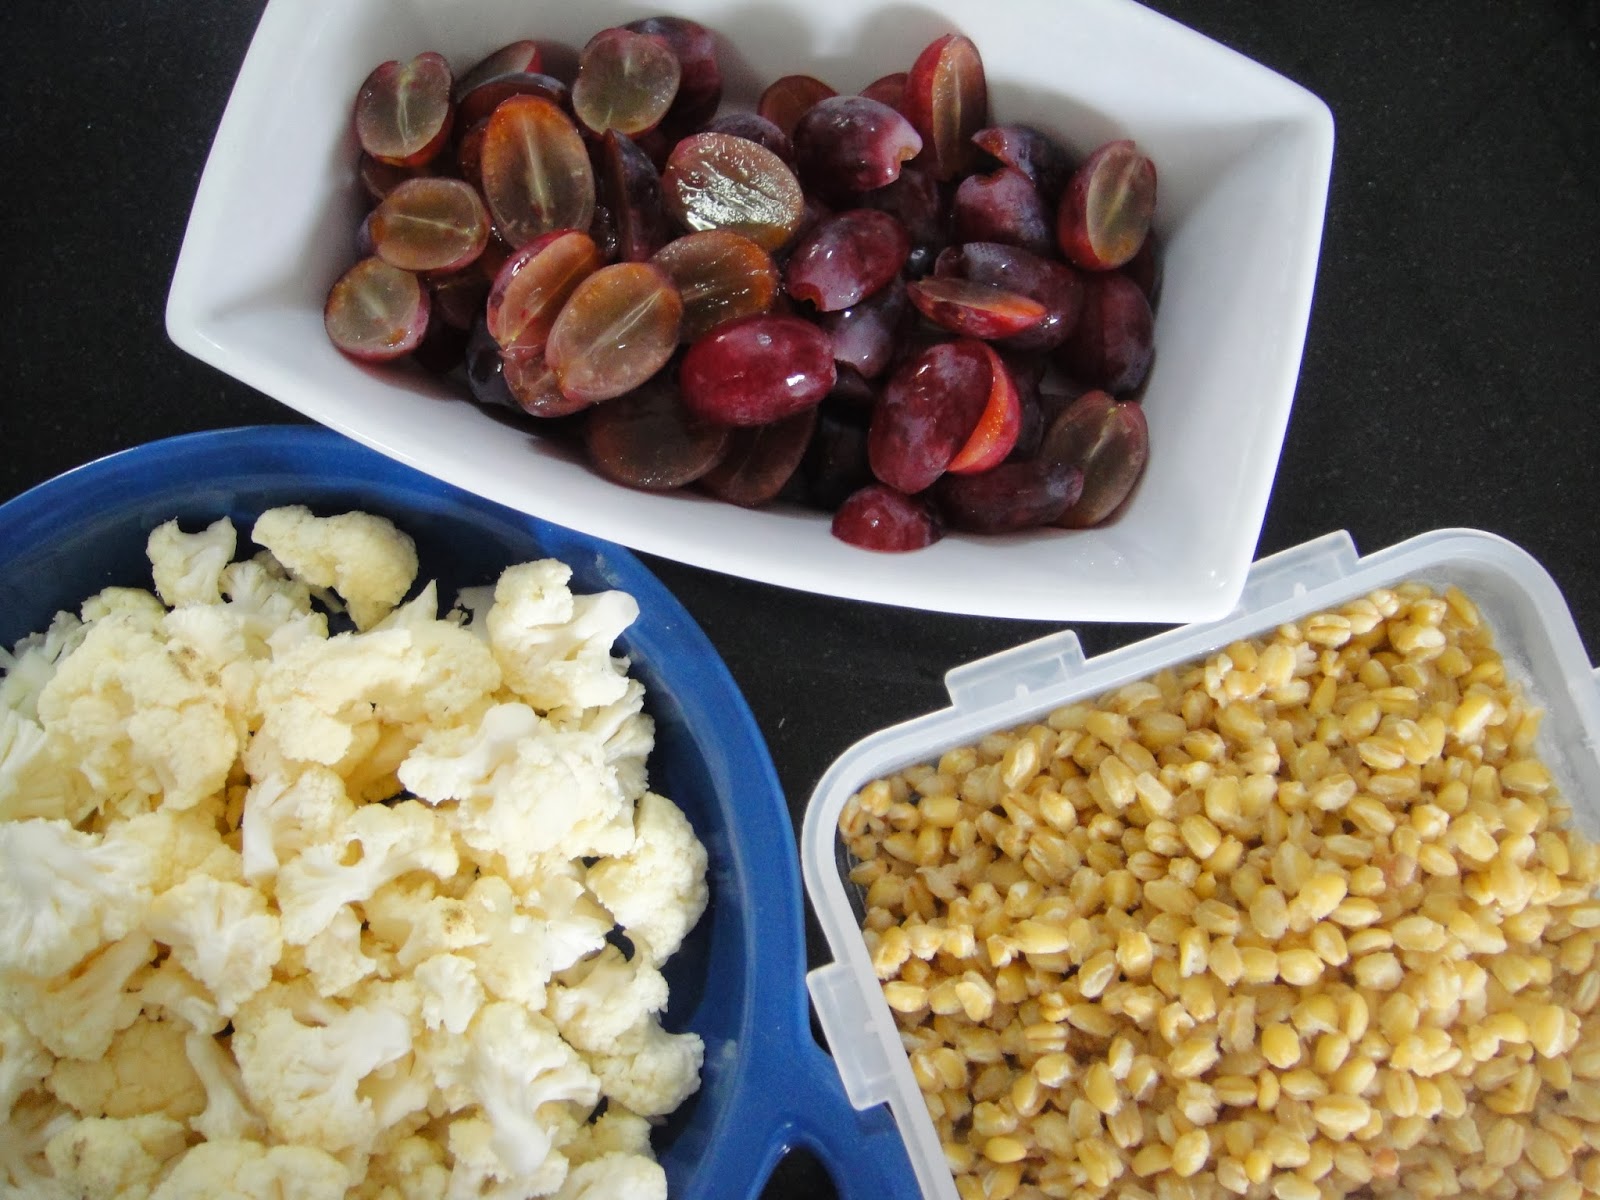
Cauliflower (small florets), Sliced Red Grapes, Cooked Wheat Berries 

Mixed Greens
 *Preparation of Cauliflower:
·      Remove the large florets from the larger head of Cauliflower
·     Cut or separate the florets into small individual pieces (see picture)
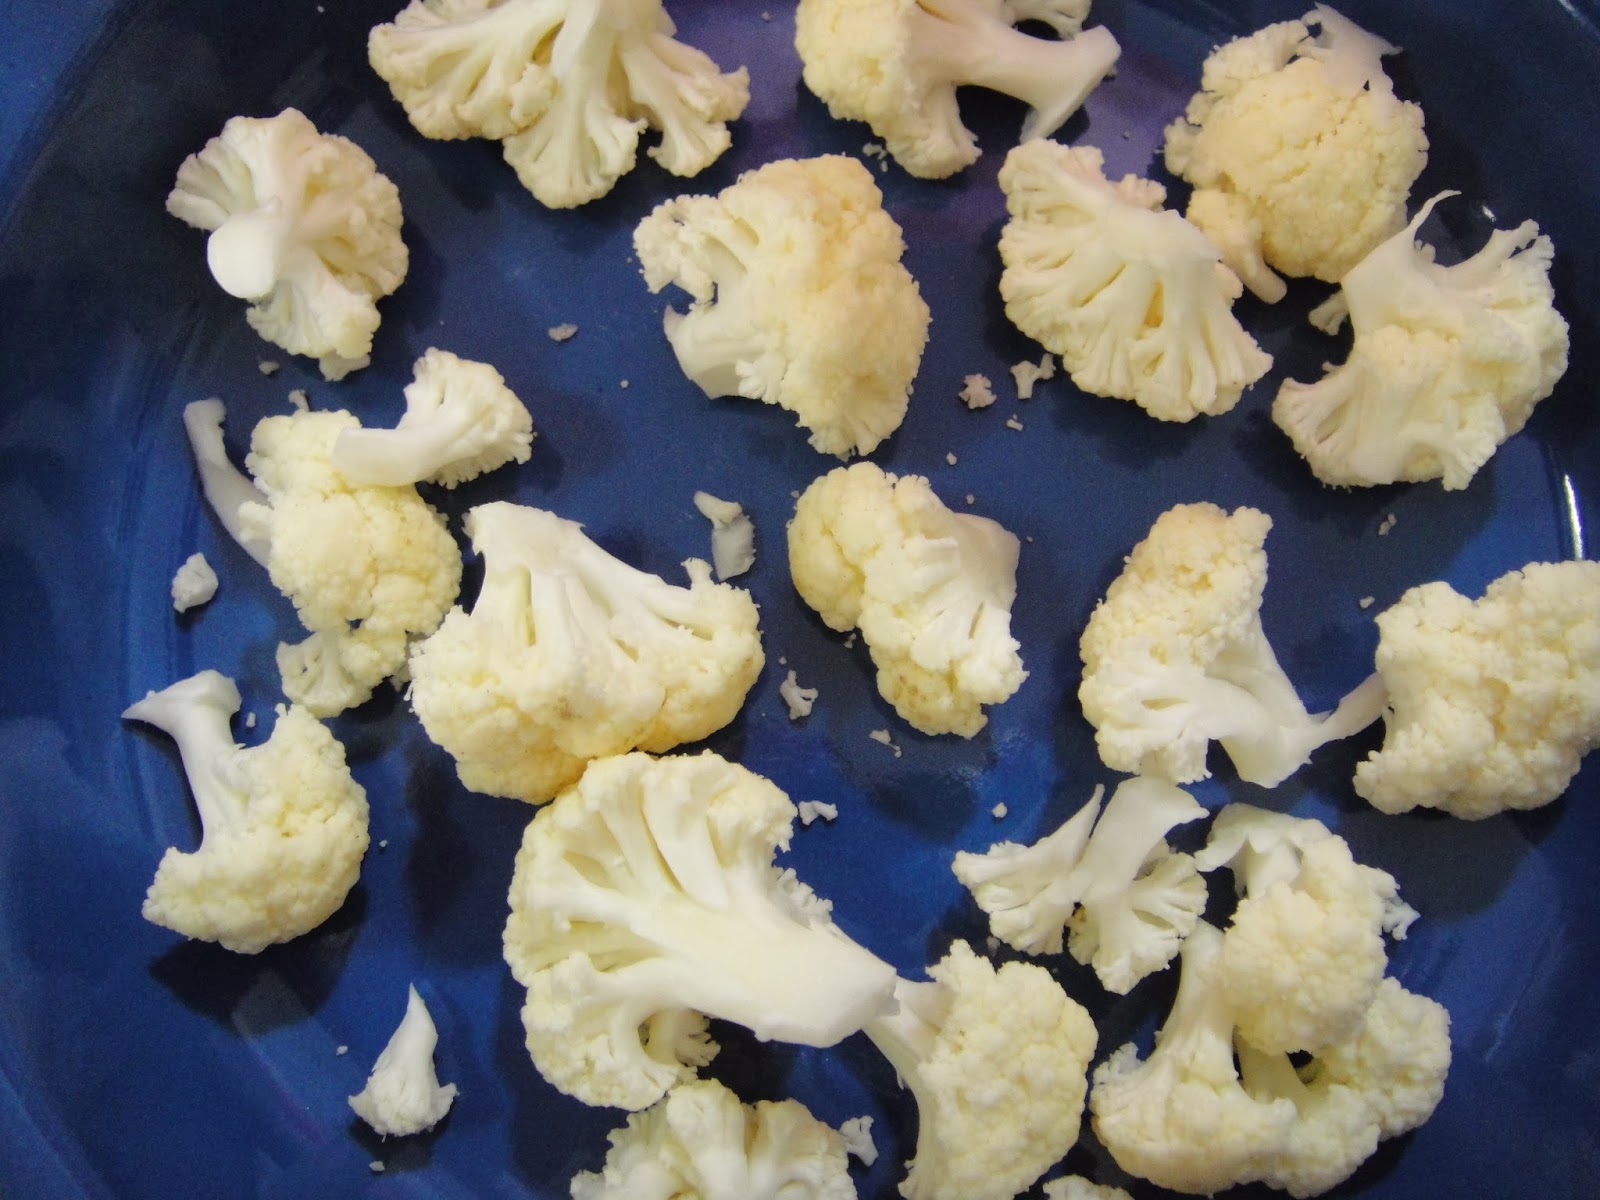
Cauliflower florets in the process of being broken into small florets
For the Dressing
·       4 tablespoons of Olive Oil
·       3 teaspoons of Balsamic Vinegar
·       2 tablespoons of Honey
·       1 large clove garlic finely chopped
·      Salt and pepper to taste
·       Optional – add thyme leaves*


Preparation of Salad:
·       In a large bowl add ALL the Dressing ingredients and mix well 
·       Add the Cauliflower pieces
·       Add the cooked Wheat Berries
·       Add the Seedless Red Grapes
·       Mix all the ingredients in the Dressing until they are well coated

Mixture of Cauliflower, Grapes and Wheat Berries
Before Baking
Ø  THEN:
·      Place parchment paper on an oven pan
·      Pour the mixed ingredients onto the parchment lined pan (including any extra liquid) 
·      Gently spread the ingredients in the pan (see picture below)
·      Bake at 180°C for about ½ hour or until the small Cauliflower pieces start to brown
·      About half way through check and mix the ingredients in the pan [add a bit of olive oil if the mix looks too dry]

Mixture of Cauliflower, Grapes and Wheat Berries
After Baking
 
Ø  THEN:
·        Put the Mixed Salad Greens in a large salad bowl
·        Remove the pan from the oven, allow it to cool a little bit
·        Pour everything on to the Mixed Salad Greens
·        Mix together gently
[You may need to adjust the seasoning or add a bit more olive oil or honey]
The Mixed Salad Greens WILL wilt a bit but they will also retain their green color.

Warm Salad of Wheat Berries, Grapes and Cauliflower and Mixed Greens
* * *

**Preparation of Wheat Berries – makes approximately 3 cups:
·        Wash 1 cup of Wheat Berries
·        Place the washed Wheat Berries into a medium size pot add 3 cups of water and a dash of kosher salt
·        Bring to a boil, reduce heat to a simmer, cover the pan
·        Check for doneness at about 30 minutes – they should be chewy but not tough
·        Check every 5 minutes – you may need to cook them up to 30 minutes more, and add water, depending on the variety and the age of the berries
·        Drain any extra water and set aside [store any extra wheat berries in the refrigerator for up to a week]
Wheat Berries after cooking

Serving Suggestions:
ØServe as a side dish
ØServe as a main dish with feta cubes
ØServe with slices of cooked chicken or beef


Tuesday, August 13, 2013

Buttermilk Waffles

Yesterday my husband asked me to make Buttermilk Waffles for his father. While preparing them I realized that this is a recipe I would like to share – it is simple, quick and versatile.
[Be warned – you will need to purchase a WAFFLE IRON for this recipe, but you will use it over and over again. In fact, you can use your WAFFLE IRON as a Panini Press so I strongly recommend purchasing a good one, mine has been in use for over 20 years!]
By versatile, I mean buttermilk waffles can be served as breakfast with maple syrup and butter, but they also make for great late night snacks and/or fancy deserts served with ice cream, or even a mixed fruit salad or both!
By the way – you can waffle up a double batch of the batter, waffle them up and then freeze them; to unfreeze them just put them in your toaster.

[Preparation time: 10 min + cooking time 20 minutes depending on the number of waffles you make]
Servings: the single batch makes about 12 small waffles and 5-6 large waffles

Ingredients:                                                 
·       2 cups of plain flour
·       ¼ teaspoon baking soda
·        2 teaspoons baking powder
·        2 eggs
·       1/3 cup cooking oil + 1 tablespoon (or 6 tablespoons)
·       Salt – a pinch
·       2 cups of buttermilk
Buttermilk (top right); Flour (top left);
Eggs (center); Baking powder & baking soda(bottom right)
Canola Oil (bottom center)

Preparation:
ØPREHEAT YOUR WAFFLE IRON

In a medium sized mixing bowl:
·      Mix together dry ingredients - the flour, baking soda, baking powder 
·       Add the eggs
·       Add the oil
·      Add the buttermilk

BEFORE Mixing
Ø  THEN:
·       Mix it all together into a slightly lumpy batter
BE CAREFUL NOT TO OVER-MIX THE BATTER!!!!

AFTER Mixing
·        After mixing the batter let it sit for at least half an hour -
OR prepare the batter the night before and let it sit in the refrigerator overnight

Ø  THEN:
·       Lightly spray your waffle iron with canola oil
·        Ladle your batter onto the HOT waffle iron
BEWARE: The batter should not fill the whole waffle iron – leave a bit of a border around the batter – it will spread by itself – you will learn how much to ladle on by trial and error

Careful not to add too much or too little batter!!!
·      The waffles are ready when steam starts coming out the sides of the waffle iron (about 3 minutes) – I usually wait a bit more then open the waffle iron and remove the waffle – they should be golden brown


Golden Brown Buttermilk Waffles


Serving Suggestions:
ØServe with maple syrup, ice cream, powdered sugar, fruit salad

*The buttermilk can be substituted with 1¼ cup of milk at room temperature mixed with two tablespoons of white vinegar – leave for 10 minutes before use


Monday, April 29, 2013

Ice Box Cookies I – Sesame Seed-Ground Coconut Slice and Baked Cookies

This is very practical keep-on-hand cookie recipe.
You will need a medium-sized mixing bowl and a spoon for the preparation – plastic wrap to freeze and a good knife for cutting. The dough is so easy to work with. You can freeze the baked cookies also.
You can make the dough ahead of time and leave it in the freezer for future use, then just cut and bake when your cookie jar is empty or when unexpected company arrives. You can also vary the size and shape of the cookies. I started out by making little button-like cookies to accompany my morning coffee, last week I made larger cookies for a dinner party.
You will get about 100 small button sized cookies and about 50 large round cookies from one batch of the mix.
The cookies are light, crunchy and not too sweet.

[Rating – very easy]
Preparation time
10 minutes to collect and mix the ingredients
1 hour in the freezer/refrigerator - optional overnight or whenever you want/need to bake
10-15 minutes to bake

Ingredients
½ cup melted butter or margarine (100 grams)
½ cup sugar (~100 grams)
1 cup ground almonds (~100 grams)
2/3 cup cake flour (~110 grams)
2 teaspoons or one envelope baking powder
½ cup sesame seeds (~60 grams)
½ cup ground coconut (~40 grams)
1 large egg (beaten)
 
From right to left: ground almonds, sesame seeds, sugar, ground coconut, white flour;
Center: un-melted margarine; Below: baking powder, one large egg
Note: If you like, you can increase the amounts of ground almonds and ground coconut by 10-20 grams and it will not affect the quality of the dough.

Plastic wrap for wrapping and freezing cookie rolls
2 sheets of baking paper & 2 oven-sized baking pans

Preparation
·       In a medium bowl Melt the butter/margarine in the microwave.
·       Add: Sugar while the margarine is warm and mix together with a spoon


Melted margarine and sugar before mixing with a spoon

·       Then with a large spoon ADD and MIX in the dry ingredients:
[Ground Almonds, Sesame Seeds, Coconut, Baking Powder, Cake Flour]


Dry ingredients added to wet ingredients before mixing with a spoon

·       Add the Egg

Add the egg and mix
      ·       Mix this all together with a spoon until the ingredients are evenly distributed and the dough starts to come together.

Cookie dough in the process of coming together

Cookie dough after mixing - ready for shaping and wrapping

·       Separate the dough and shape into long round snakes, (or whatever shape you prefer)
·       Wrap each piece of dough in plastic wrap and freeze/refrigerate for at least one hour or overnight.


Cookie dough shaped into cylinder before wrapping in plastic wrap

 
Side view of the same
·       Remove
the frozen cookie logs from the freezer/refrigerator
·       Remove the plastic wrap.


Frozen cookie dough almost ready for slicing
[plastic wrap must be removed before slicing]

·       Slice the frozen dough into thin slices.

Cookie dough sliced
Note: smaller and larger sized cylinders of cookie dough


·       Place the sliced cookie dough on baking paper [you will need at least 2 oven-sized baking sheets - The cookies will spread a little bit while they bake so leave some space between un-baked cookies.]

Cookie dough placed on baking sheets
Note: larger and small sized cookies
·       Bake at 180°C for 15 minutes or until light brown.
(You may have to turn the trays mid-way to evenly brown the cookies.)


Golden Brown Sesame Seed-Ground Coconut Slice and Baked Cookies

Options:
èRemember you can vary the size and shape of the cookies.
èYou may want to coat the outside of cookies with either sesame seeds or coconut before you wrap them for freezing.


Tuesday, February 26, 2013

Roasted Turkey Breast

This is what I do with the other half of the Turkey Breast [see previous post]. This is an easy meal to prepare but takes time. This is a meal very low in fat and high in protein. The meat is prepared in two phases – first the turkey breast is baked and then it is immersed in a light tomato sauce and cooked again. This keeps the meat moist and tender.
The Roasted Turkey Breast in the sauce can be cooked ahead of time. As with all things cooked in a tomato sauce it tastes even better the day after. [Preparation time: 10-20 min + cooking time approximately 1 hour + 30 minutes]
Servings: 10-12 portions or more
Ingredients:                   
·     1 half of Turkey breast – left whole 
·     3 large onions - sliced
·     2-3 Tablespoons Canola oil
·     3-5 tablespoons mashed/crushed garlic
·     ½ cup tomato paste
·     Salt and pepper to taste
·     2 sheets of aluminium foil

For the Sauce
·     1 can crushed tomatoes
·     1 Tablespoon sugar
·     1½ to 2 cups of water

Preparation:
·     As you slice the onions put them directly into a large pot
·     Add oil to the onions - cook down until soft and slightly brown

3 large onions sliced in a large pot
3 large onions


·     Join both pieces of aluminium foil by folding them together – they should be long enough  to be folded around the turkey breast with room to spare
two large sheets of aluminium foil - join them together
·     Place half of the slightly browned onions on the centreline of the foil
·     Sprinkle a bit of ground pepper over the onions

onions placed on centerline of the two sheets of foil (with pepper)
THEN:
·     Smear half of the crushed garlic over one side of the turkey breast
·     Smear half of the tomato paste concentrate over that

 
. . . . then smeared with tomato paste
 
turkey breast covered with crushed garlic and pepper


·        Flip the turkey breast over [smeared side down] over the onions
·        Repeat the same process with the exposed side of the turkey breast – finishing with the other half of the browned onions on top

onions placed over turkey breast
that has been smeared with tomato paste over crushed garlic
on a bed of onions
·     Salt and pepper to taste
·     Fold the foil around the turkey breast leaving breathing space in a sort of boat formation – at this point you can marinate the breast for a few hours or overnight or:


foil folded over the prepared turkey breast
·     Bake in a 180°C oven – for 1 hour
·     Remove from the oven and let REST at least ½ hour

 
turkey breast resting after baking
 [note onions and juices around the turkey]

turkey breast cooled cleaned off and ready for slicing


·     Slice the cooled and cleanted Roasted Turkey Breast [don't worry if the meat does not look fully cooked - there is a second cooking] 
 
slicing turkey breast

sliced turkey breast


·     Add the sliced Roasted Turkey Breast with gravy and onions to the tomato sauce
  
  
adding sliced turkey to light tomato sauce 

adding onions and gravy to sauce mixture


sliced turkey in the light tomato sauce 

·     Cook in the sauce for about ½ an hour
For the Sauce
·     Pour the can of crushed tomatoes into the same pot as you used to fry the onions
·     Add 1 Tablespoon sugar
·     Add 1½ to 2 cups of water
·     Add the gravy and the onions [see picture on the left above]
·     Stir this around and let the tomato mixture cook a bit about – 10 minutes
·     Add the sliced Roasted Turkey Breast and simmer for about ½ hour
 
roasted breast turkey in a light tomato sauce 

Serving Suggestions:
ØServe over hot rice, mashed potatoes or Israeli couscous.
Cooking tips:
If I am not serving this to a large crowd – then I freeze family size portions for quick lunches.
I also try to pre-cook this meal – and serve it the next day – it always tastes better.