Monday, October 20, 2014

Cracked Chocolate Cookies

These are the most amazing chocolate cookies. They are called cracked chocolate cookies because the tops crack as they bake. Now that I think about it, I have been making these cookies with my kids for over 20 years! Can't wait to bake them with the next generation - it makes for a great tradition!
The recipe is simple, not many ingredients, you do not have to roll out the dough or cut shapes or sprinkle flour. You do not need a mixer. 
You do need to measure, you do need to pour, you do need to roll the dough into little balls, and then roll these balls in a little bowl of sugar (great fun for kids) and you only need a medium-size bowl, a small bowl (for the sugar topping) and a spoon to mix with. You will line the baking sheets with parchment paper so clean-up is easy and most important they are so much fun to make with kids.
You also get instant gratification because the cookies bake quickly (please be careful not to over-bake), don't forget to let them cool.

(from top left) Karo corn syrup, margarine, flour, cocoa powder, sugar, vanilla extract
[Preparation time: 15 min + baking time ~9-12 minutes]
Servings: about 30-40 cookies depending the size

Ingredients:                                                 
·        ½ cup melted margarine – about 100 grams
·        ½ cup light corn syrup*
·        ½ cup unsweetened cocoa powder
·        ¼ cup granulated sugar
·        1 teaspoon baking soda
·        1 teaspoon ground cinnamon
·        1 teaspoon vanilla extract
·        1½ cup regular or plain flour
Topping: ¼ cup sugar in a small bowl
*Corn syrup can be bought in most supermarkets or health food stores.

Preparation:
·        Heat oven to 180°C – line your baking sheets with non-stick parchment paper (which makes for easy clean-up)
·        In a medium sized bowl mix the melted margarine, corn syrup, sugar and vanilla extract with a spoon
Mixture of Karo corn syrup, margarine, cocoa powder, sugar, vanilla extract 
·        Add the flour and the baking soda and cinnamon
Add flour
·        Gently mix together, until the flour disappears – careful not to over-mix
(The mixture should be firm but not sticky)

Cookie dough is ready once the flour is mixed in - notice the consistency
·        Make small balls, about 1 inch diameter
(The dough should not stick to your fingers)
Cookie - after rolling into a ball - note the smooth non-sticky surface of the dough 

·        Roll each cookie in the sugar that was reserved for topping


Ball of cookie dough rolled in sugar
 ·        Place the sugar coated cookies about 1 inch apart on a baking pan, give each ball a gentle pat (they will spread as they bake)

Cookies ready for baking
·        Bake at to 180°C for about 9-12 minutes
·       As the cookies bake they puff and crack on top 
   They are ready to come out of the oven
Baked cookies - the dough spreads as it bakes so leave room between each cookie
  
Notice the cracks on top?
BE CAREFUL NOT TO OVER BAKE – 
DO NOT LEAVE THEM IN THE OVEN TO COOL
OR THE COOKIES WILL DRY OUT.
THE ARE READY WHEN THE TOP BEGINS TO CRACK!!!!


A pile of baked Cracked Chocolate Cookies
Cool on the cookies sheet outside the oven – when completely cool store in an airtight container up to 1 week – they can also be frozen.

Serving Suggestions:
Munch on them with your coffee, tea, milk or hot chocolate
Serve with vanilla ice cream and powdered sugar as a fancy desert 

Sunday, October 5, 2014

GROUND MEAT & POTATO PATTIES with a Middle Eastern Flavor

These Ground Meat & Potato Patties are a tribute to my late mother-in-law. She used to make dozens of them every Friday. She showed me how to make these Meat & Potato Patties, and especially how to season them. The secret ingredient is the addition of finely chopped celery leaves combined with the chopped parsley, and the ground meat which gives the patties a nice chewy texture. It is really a palm-sized full meal.

It is quite a simple recipe; more time is spent in boiling the potatoes and then frying the patties than in preparation of the mixture itself. Of course, you can chose your own favorite seasoning – I continue to season them the way she showed me, I suppose because of the fond memories of learning by watching and doing in her kitchen.
(from top right) Parsley, Salt, cumin, sweet paprika, turmeric, coarsely ground black pepper, potatoes, ground beef, chopped onion, whole celery leaves, egg

[Rating – medium, there are steps involved]
Preparation time
20-25 minutes boiling potatoes
40 minutes [for frying, depending on  how many patties you make]
10 minutes for combining the ingredients

Ingredients
2 large or 4 medium or 6 smallish white potatoes (see picture above)
3/4 cup (250 grams) uncooked chopped meat (beef, turkey, chicken)
1 large handful of parsley – chopped (about 1/2 cup chopped) 
3 tablespoons of finely chopped celery tops
1 medium size red onion finely chopped
3 heaping tablespoons flour
2 eggs
2 teaspoons salt
1 teaspoon ground black pepper
1 tablespoon ground Turmeric
1 teaspoon ground Cumin
½ teaspoon ground Coriander
1 teaspoon Sweet Paprika
¼ teaspoon Cayenne Pepper or Chili Flakes (optional)

Oil for Frying

Pre-Preparation
·       Boil potatoes** with skin on until they are tender
 Boil potatoes uncovered
·    Peel the potatoes (pour out the hot water, then run the potatoes under cold water, the skin should peel right off, careful not to burn yourself).

Preparation
·       Place the whole potatoes in a medium sized bowl
·       Gently break-up the potatoes (do not completely mash)
 Potatoes not completely mashed there should be small lumps
·       Add all the other ingredients (except the oil for frying)

 In the bowl with the potatoes
Chopped parsley and celery leaves, eggs, seasonings and flour, chopped onion and chopped meat 

·   Gently mix together ( I use my hands)
   The mixture should be sort of lumpy and sort of smooth.

Everything mixed together 
·       Using wet hands form round patties about the size of your palm, not too thick, not too thin.
Patties should be about the size of your palm 

·       Heat up the oil (about half an inch deep) in a frying pan
·       Add the patties to the frying pan
Patties frying - be sure not to crowd the pan
·       When the edges begin to brown, they are ready to be turned over
Patties turned over
·       Remove the patties from the frying pan when both sides look brown, place on paper towel
Ground Meat & Vegetable Patties - ready to eat!!!

Serving Suggestions:
Serve with yogurt, eggs, or salad.

My husband likes to put 2 patties between 2 slices of fresh bread with a healthy spread of spicy Harissa sauce.
They can also be eaten as is or as a side dish.

**Always put your potatoes in cold water (to cover) with a good pinch of salt, then begin to boil. Partially cover the pot or don't cover it at all.


Monday, May 5, 2014

Sort of Apple Crumble Cake

This "Sort of Apple Crumble Cake" has always been a big hit with my family and friends.  
It uses basic ingredients, apples, sugar, margarine, flour and eggs for the most part, but of course there are a few additions that bump the flavor up quite a bit.
You don’t have to make such a large cake (as pictured here) in a disposable pan; I usually make a number of smaller cakes which I freeze and then re-warm. 
This super large cake has become an annual event - my oldest daughter and her childhood friends have been asking me to make it for their annual Independence Day picnic for upwards of 15 years. Now that I think about it, this is really a "can’t eat just one piece" type of cake.
I also invested in an **Apple Peeler, Slicer, Corer which makes the Apple coring, slicing peeling part easy and very professional looking!
Ingredients: (from left to right) Granny Smith Apples, Applesauce, Cake Flour, Margarine,
Cinnamon, Vanilla Sugar, Apricot Jelly, 2 Eggs, Sugar
 [Rating – easy, but there are steps involved]
Preparation time
20 minutes [using one very large aluminum disposable pan or smaller pans]
30 minutes [if you have to peel and slice the apples] 
45 minutes baking time

Ingredients
Dough
200 grams of melted margarine or butter (I use margarine)
1 cup sugar
4 cups cake flour
2 eggs
2 tablespoons oil
2 envelops of vanilla sugar
Salt 
Cake Flour, Margarine, Vanilla Sugar, 2 Eggs, Sugar
Filling 
(the measurements are approximate, you can use more or less but you must cover the dough with each layer of ingredient)
2 cups of Jelly/Jam*
2 cups Applesauce (sweetened or unsweetened) (about one can)
6-8 Granny Smith apples (peeled and sliced)**
½ cup Lemon juice (to prevent the apples from turning brown)
¼ cup sugar
Cinnamon (about 4-6 Tablespoons or more)
*Apricot, Strawberry, Blueberry, Passion Fruit or whatever you have around.
**The Apple Peeler, Corer and Slicer can be purchased from AMAZON and DOMO. 

Granny Smith Apples, Cinnamon, Jelly/Jam/Lemon Juice, Applesauce
and my good old Apple Peeler Corer Slicer**
Preparation
Step 1: Dough
In a medium sized bowl mix together with a big spoon:
Melted margarine*, sugar, oil, flour eggs and 1 envelop of vanilla sugar.
Mix with a strong spoon, until all the ingredients are mixed together (about 2-3 minutes).
The mixture will produce a dough that is soft and easy to work with. 
The dough should be soft and pliable and NOT stick to your fingers.
Let the dough rest a bit.
*(a quick zap in the microwave oven melts the margarine)


Margarine with Sugar    

Margarine, Sugar and 2 Eggs


Add the Cake Flour and Salt and Mix with that spoon

Result: Dough - soft and not sticky


Step 2: Apples
Peel and core the apples, then cut into half-moon thin slices; 
I actually cheat, I have this great apple peeler, slicer, corer** that does it all at once (see picture); all I have to do is cut the apple in half to get my half-moon shaped slices.
In a large bowl add the apples and coat with lemon juice, sugar and cinnamon.
Mix by hand until all the apples are coated evening.
Let sit of a few minutes.
**The Apple Peeler, Corer and Slicer can be purchased at AMAZON and DOMO.

My Peeler, Corer, Slicer in action**

Apple - sliced, cored and peeled

Cut slices
Slice down the center
to make half-moons


Add lemon juice, sugar and cinnamon
Mix by-hand to coat the Apples


**The Apple Peeler, Corer and Slicer can be purchased at AMAZON and DOMO.

Step 3: The Cake
This total recipe is good for a large aluminum throw away pan, with high sides.
(Feel free to make smaller cakes, as gifts or to freeze for later.)
Take a large handful of dough, squeeze it together to make a ball.
Carefully press a thin layer of the dough on the bottom or your pan, the important word is thin – don’t be afraid to go thin!
Repeat this step until the whole bottom is covered evenly.
[There should be about half the dough mixture left in the bowl.]

Apple slices, Jelly, Applesauce,
Dough and a Very Large Disposable Baking Pan

Dough on the pan before
pressing into a THIN layer


See how THIN the layer of dough should be

The whole pan is covered


                 Dough remaining in the bowl (about 2 large handfuls)
Step 4: Jelly/Jam
Next – spread the jam or jelly evenly over the dough.
Use the back of a spoon – make sure you get the jelly into the all the corners.


Adding the Jelly/Jam

Jelly/Jam spread over the Dough


Step 5: Applesauce
Spread the applesauce over the jelly/jam.
Again, Use a spoon to spread it evenly over the jelly.

Adding Applesauce

Applesauce spread over the Jelly/Jam


Step 6: Apples
Carefully place the apples in a single layer on the applesauce (see photo).
Place Apples in a single layer

Apple layer completed


Step 7: Crumble Topping
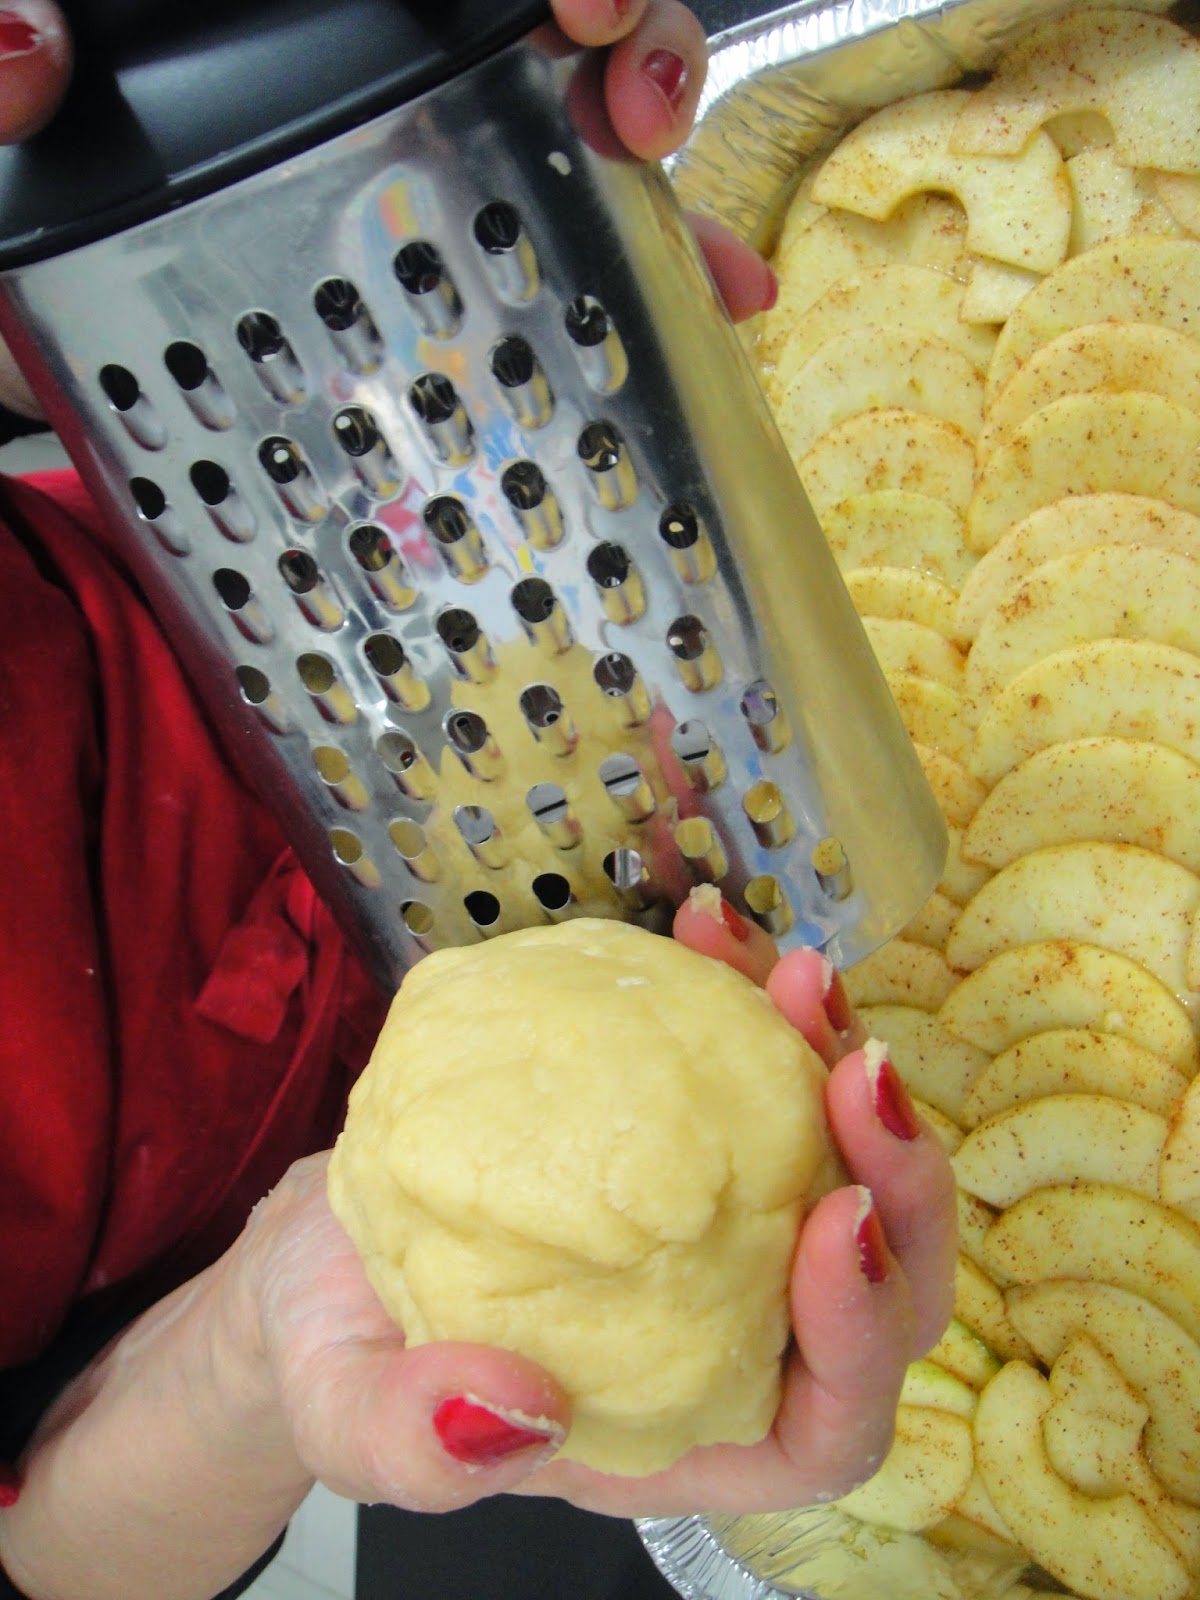
Take a big handful of squeezed together dough and using an “old fashioned” potato grater, grate the dough over the apples until they are completely covered; use all the remaining dough.

Take a fist size handful of dough
and grate over the Apples

Grated dough scattered on Apples


Grated Dough Covering Apples, etc.

Step 8: The Finish
Sprinkle some cinnamon and the second envelop of vanilla sugar over the top.
Bake at about 180°C (350°F) for about 45 minutes or until the jelly starts bubbling out the side and the top of the cake starts to brown slightly.
Finished Product:
Sort of Apple Crumble Cake
Serving Options:
The "Sort of Apple Crumble Cake" can be served hot or cold. 
It can stand alone or it can be served with Ice Cream; it doesn't need cream or syrup it is really very moist. 
It can be frozen and reheated.
I sometimes cut the cake into serving sized pieces and freeze them, that way I can treat myself to a 'single' piece with my morning coffee.


**The Apple Peeler, Corer and Slicer can be purchased at AMAZON and DOMO.